Welcome to KnowHow Daily!
Practical guides, money-saving tips, tech solutions, government benefits, and useful information for everyday life.
Welcome to KnowHow Daily!
Practical guides, money-saving tips, tech solutions, government benefits, and useful information for everyday life.

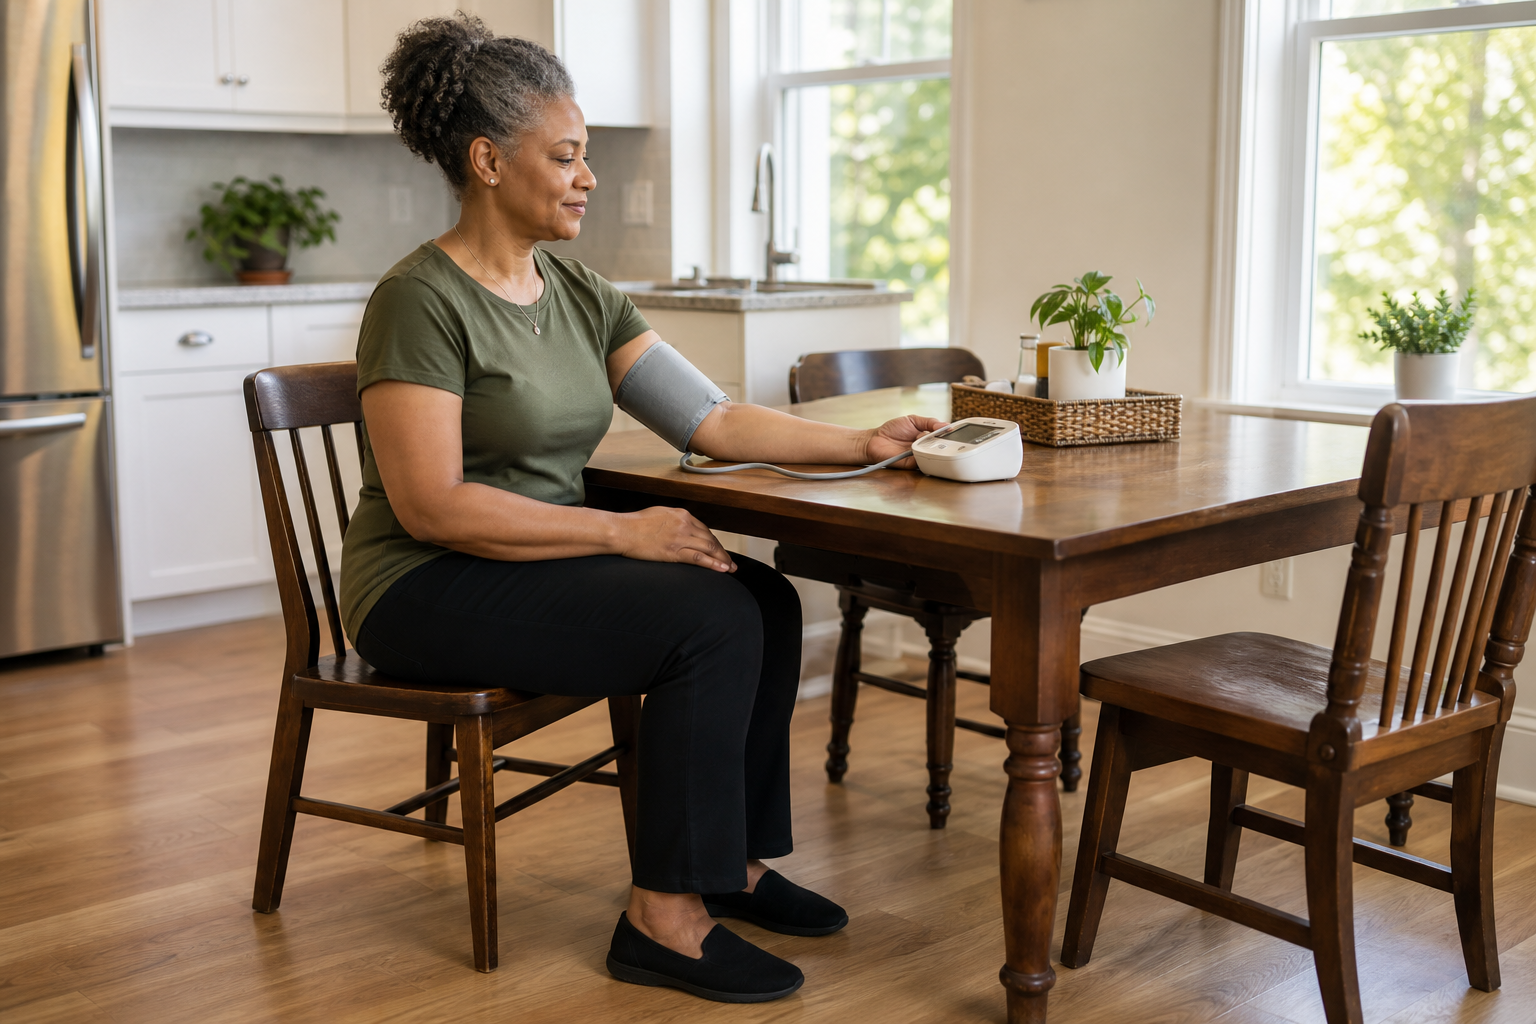
Learn how to measure blood pressure at home correctly, including monitor choice, cuff placement, body position, repeat readings, logging, and emergency warning signs.
The most reliable home reading comes from three things working together: the right monitor, the right cuff size, and consistent positioning. Use an automatic upper-arm monitor, place the cuff on bare skin, support your arm at heart level, and stay quiet while the device runs.
Home monitoring can help your healthcare professional see whether your blood pressure is consistently elevated or whether treatment is working. It does not replace regular medical visits, and one unusual reading usually does not tell the whole story.

Look for an automatic cuff-style monitor that goes around the upper arm. Wrist and finger monitors can be less reliable because small changes in wrist position can affect the result. A validated wrist device may still be appropriate in certain situations, such as when a correctly sized upper-arm cuff is not available or cannot be used.
Cuff size matters just as much as the monitor itself. Measure around your upper arm and compare that measurement with the cuff range listed by the manufacturer. A cuff that is too small can produce a falsely high reading, while a poor fit can make readings inconsistent.
In the United States, you can look for devices on the independent Validated Device Listing. Validation means the device has met specified clinical-accuracy requirements; it does not mean every reading will be accurate if the cuff is the wrong size or the technique is poor.
Search the official Validated Device ListingIf you are pregnant, monitoring a child, or need an extra-small or extra-large cuff, make sure the specific device and cuff are validated for that population. Bring the monitor to a medical appointment so a healthcare professional can compare it with the office equipment and show you how to use it.
Small changes before the measurement can push a reading up temporarily. For the most consistent result:
You do not need to create perfect conditions every time you feel unwell. If you are checking because you have symptoms, take the reading safely and note what was happening. The goal of preparation is to make routine readings comparable, not to delay care.

Sit in a chair with your back supported. Keep both feet flat on the floor and uncross your legs. Rest your arm on a table or other firm surface so the middle of the cuff is level with your heart. Let your hand rest open and keep your shoulder relaxed.
Place the cuff on your bare upper arm with its lower edge directly above the bend of your elbow. Follow the monitor’s instructions for aligning the artery marker, if the cuff has one. The cuff should feel snug but not painfully tight before inflation.
Do not talk, use your phone, move around, or flex your arm during the measurement. Talking and unsupported arms can raise the result or make it less dependable. If you are using a wrist monitor because an upper-arm monitor is unsuitable, keep the wrist exactly at heart level and avoid bending it.
Press start and remain still until the monitor finishes. Wait about one minute, then take a second reading. Record both numbers, along with the date, time, arm used, and any unusual circumstances such as recent stress, illness, pain, or missed medication.
Many clinicians ask people who are evaluating their usual blood pressure to take two readings in the morning and two in the evening for several days. The exact schedule depends on why you are monitoring, so follow the plan given by your healthcare professional rather than changing medication based on a home number.
Use a paper log, the monitor’s memory, or an approved health app. If the monitor averages readings, keep the individual results too when possible. A series of readings is more useful than focusing on the highest or lowest number.
The top number is the systolic pressure, or the pressure in the arteries when the heart beats. The bottom number is the diastolic pressure, or the pressure between beats. Blood pressure is reported in millimeters of mercury, written as mm Hg.
| Category for adults | Systolic | Diastolic |
|---|---|---|
| Normal | Less than 120 | Less than 80 |
| Elevated | 120–129 | Less than 80 |
| Stage 1 high blood pressure | 130–139 | 80–89 |
| Stage 2 high blood pressure | 140 or higher | 90 or higher |
These categories help describe readings, but they are not a diagnosis from a single home measurement. Your healthcare professional may consider readings taken on different days, your medical history, medications, age, pregnancy status, and other factors.
If a reading is higher than 180/120 mm Hg, wait at least one minute and measure again. If it remains that high, contact a healthcare professional promptly even if you feel well. Do not take extra medication unless your prescriber has specifically told you what to do.
Call 911 immediately if the reading is higher than 180/120 and you also have chest pain, shortness of breath, back pain, weakness or numbness, vision changes, difficulty speaking, confusion, or another new, serious symptom. Do not wait for the number to fall on its own.
Pregnancy changes the context. If you are pregnant or recently gave birth and have high readings or symptoms such as severe headache, vision changes, upper abdominal pain, sudden swelling, or shortness of breath, contact your maternity care team or seek urgent care according to their instructions.
The practical goal is consistency. A properly fitted cuff and repeat readings taken in the same calm position give your care team much better information than a hurried number taken after activity or stress.
A. Either arm can be used, but ask your healthcare professional whether one arm should be your standard. If one arm consistently gives higher readings, your clinician may recommend using that arm for future monitoring.
A. For the most reliable result, place the cuff on bare skin. Clothing under the cuff can affect how it inflates and may make the reading less dependable.
A. Do not use a smartwatch or cuffless device as a replacement for a validated blood pressure monitor unless your healthcare professional specifically directs you to do so. For routine home monitoring, use a validated cuff-style device.
A. Keep a consistent log and discuss the pattern with your healthcare professional. Do not diagnose yourself or start, stop, or change blood pressure medication based only on home readings.
A. Blood pressure changes with stress, activity, timing, caffeine, pain, and positioning. Some people have higher readings in medical settings, while others have normal office readings but higher readings at home. Comparing your monitor with office equipment can help identify technique or device differences.